Levels Dance Remix – The volumes, panning and plugins
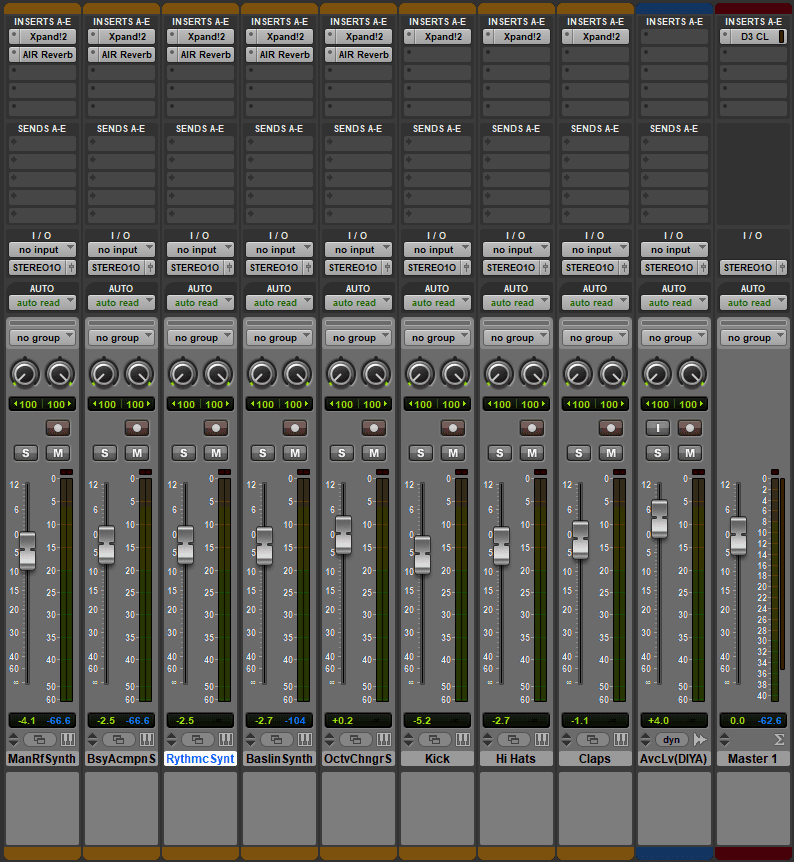
The mixing for this track sees the main riff synth and kick drum being the lowered slightly, due to the sounds on those tracks being generally louder than the others. Regardless of this, though, most of the tracks have been lowered slightly to place focus on the vocals and the Octave Changer Synth, which have had their volume increased to bring them forward in the mix for their respective parts. This is because the synth sound I selected on the Xpand!2 plugin was quieter compared to the others (the opposite problem to the kick and main riff) and needed a very slight boost in volume to prevent it from being lost in the mix. The vocals needed it too, because they were one of the most important aspects of this remix (they were featured in the original song too), and it helped to give the lyrics some clarity, being able to be heard regardless of the other sounds in the background. In addition, all of the tracks, which were stereo tracks, were panned to the far left and right simultaneously to help the mix sound wider (where it covers more empty space in the stereo mix), because this achieved the same effect as if the panning was right in the center, but had the additional feeling of almost encircling the listener on the speakers, playing sound all around, like a surround sound system.
There wasn’t much to be done when it came to the mastering stage, as I liked the sounds as they were. This was because it felt quite robotic to listen to (which was the intended effect), but this was offset by the vocals, which brought life into the track and rose above the synths, similar to how most female vocals “float above the synths” in Trance songs. This was also helped by the use of reverb on all of the synths, which helped to make the sound slightly more ‘wet’ (where the effect is heard on the output sound, compared to the ‘dry’ input sound where no effect is heard), because it allowed the synths to fill the same space with their sound, thus providing a nice back up sound underneath the vocals.
I would have also added some plugins onto the vocals, but I chose not to because I wanted to pay homage to Avicii, who unfortunately passed away earlier this year, by keeping the vocals exactly as they were in the original song (the original vocals came with reverb and delay already programmed into them so I didn’t need to add the plugins). The reason for this was because Avicii was an idol of mine when I was younger, and even now I still enjoy his works. I felt that keeping the vocals as close as possible to the original ones was a good way to pay tribute to an artist I enjoyed.
And lastly, I applied a compressor onto the master track to have a soft reduction to the dynamic frequency, as well as a reduction in the volume of the song. This was done as the song felt slightly too loud, which meant I had to use the compressor on the master fader to control how loud the song needed to be (in this case I reduced the sound slightly as I didn’t want it to sound too intense). I chose not to use the EQ plugin on any of the tracks for this particular song because I preferred the sounds I had chosen already, and felt that I didn’t need to change any frequencies in order to improve the sound quality. Furthermore, the compressor on the master fader did the purpose I would have used the EQ for across all of the tracks, reducing the dynamic frequency range to get rid of the highest and lowest frequencies to clean up the sound.
The song, prior to the mixing/mastering stage, sounded like this:
The song now sounds like this:
Leave a Reply