George Walker's Audio Project 2 Resit

Just another University of Lincoln Coursework Sites site

Author: George Walker (Page 1 of 2)

Reflective Summary

The creation of this EP was an intriguing journey through the world of EDM for me, and allowed me to discover many new things which I previously had not even realized. Prior to starting this project, I had only a vague idea about how many genres were within EDM, knowing about the existence of House, Trance, Dubstep, Hardstyle, Techno and Drum & Bass initially. However, it was made abundantly clear early on that I never knew exactly how many options there were until I began to properly research it. I was pleased about finding this out, though, as it allowed me a huge choice of what genres to use for each of the songs, and gave me enough insight into each of them and their sub-genres to make educated choices based on the features I wanted to include in my songs. I narrowed down my choices into the 4 different genres I was interested in using for this EP, because that made the choice a little easier to make, ruling out the genres I did not prefer, either because I simply did not like how they sounded or because I was worried about the technicalities behind making them. In the case of this EP, my songs were either Trance or Techno songs/remixes, as they included similar instrumentations for their drum kits (most notably the ‘4 on the floor’ kick drum and the snare/claps on every second beat, as well as their use of riffs) but gave different feelings from one another to the listener, which made me curious enough to want to put this into practice.

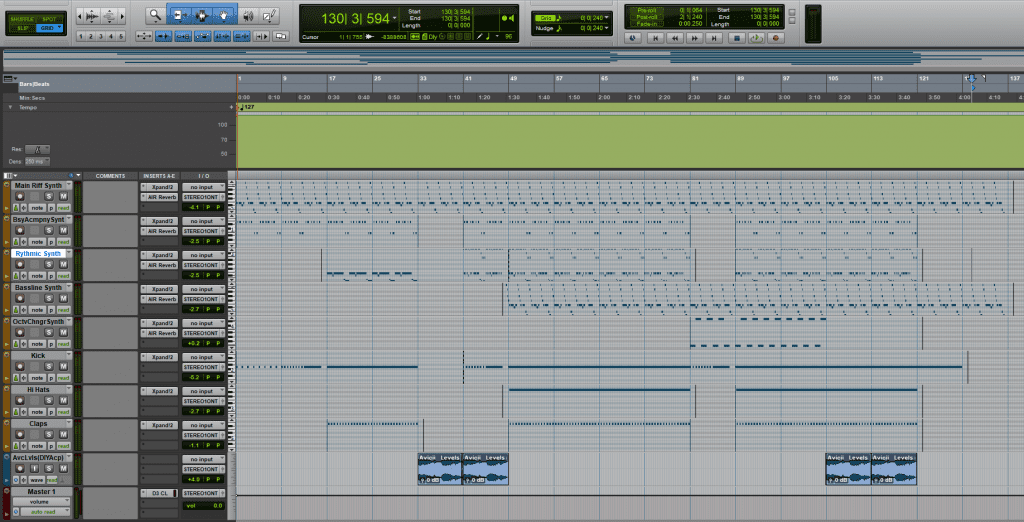
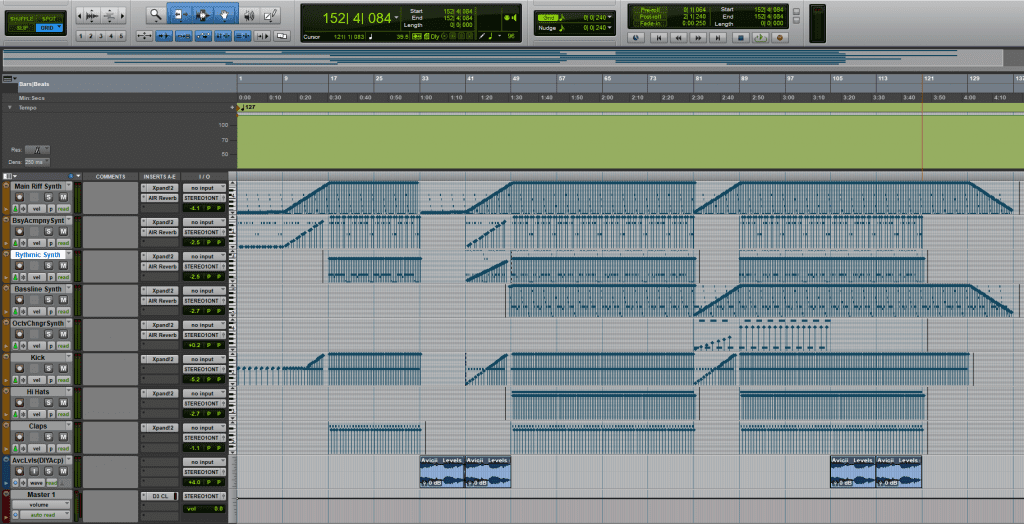
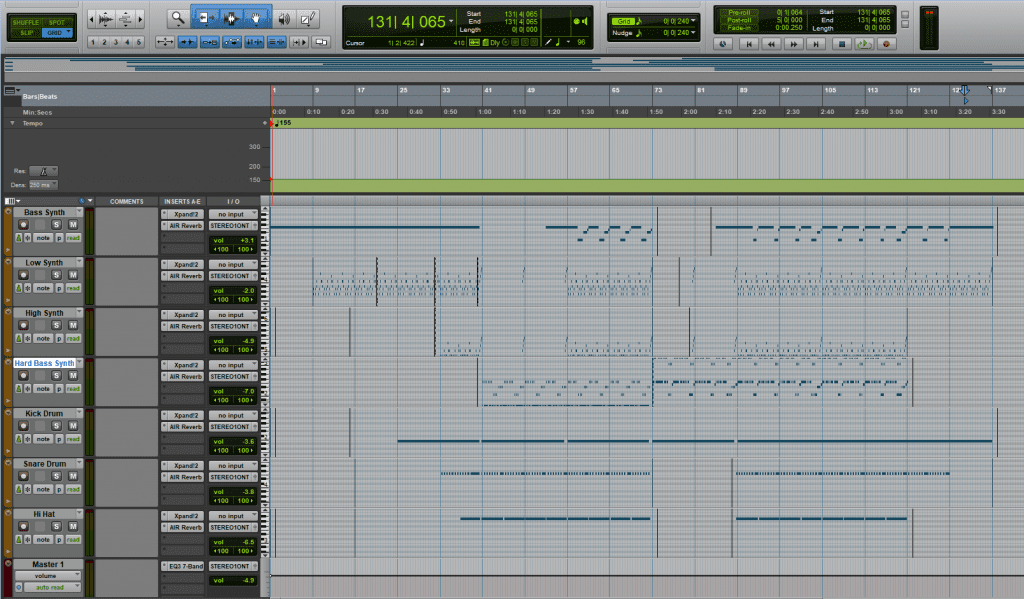
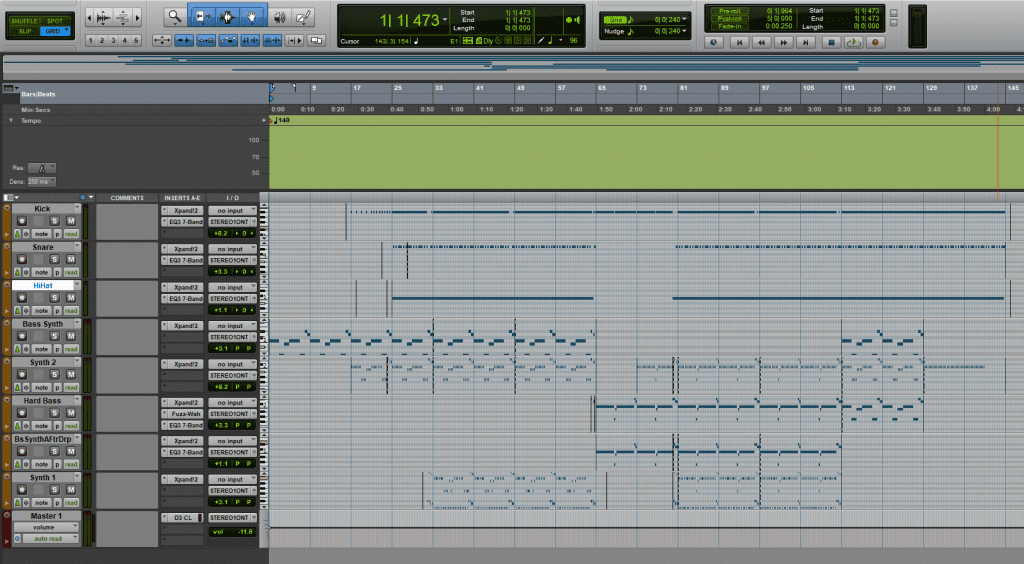
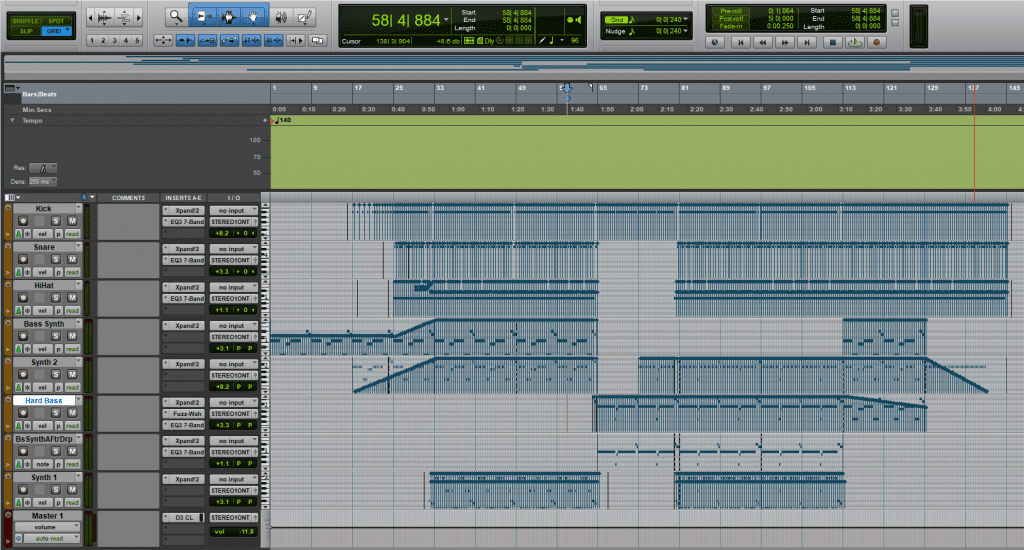
The practical side of the EP (the sequencing, mixing and mastering) was incredibly enjoyable to do and allowed me to properly put my composing skills to the test. On the remixes, which were based on the original songs they came from (Wandering Eye and Levels respectively), it was slightly easier as I already had an idea of what the song would sound like, and simply had to create my own original version of those aforementioned songs. I thoroughly enjoyed doing these because it allowed me to create my own version of songs that I used to dream of being able to make when I was younger, so it really hit home on a personal note. Not only that, but doing the remixes also placed more emphasis on making the songs sound unique without detracting from the importance of composing the pieces from the ground up. I had to create the songs without changing the feel of them too much, which was a great challenge to try and accomplish, requiring all of my skills as a composer as well as my skills on ProTools to match the professional product I was trying to remix.

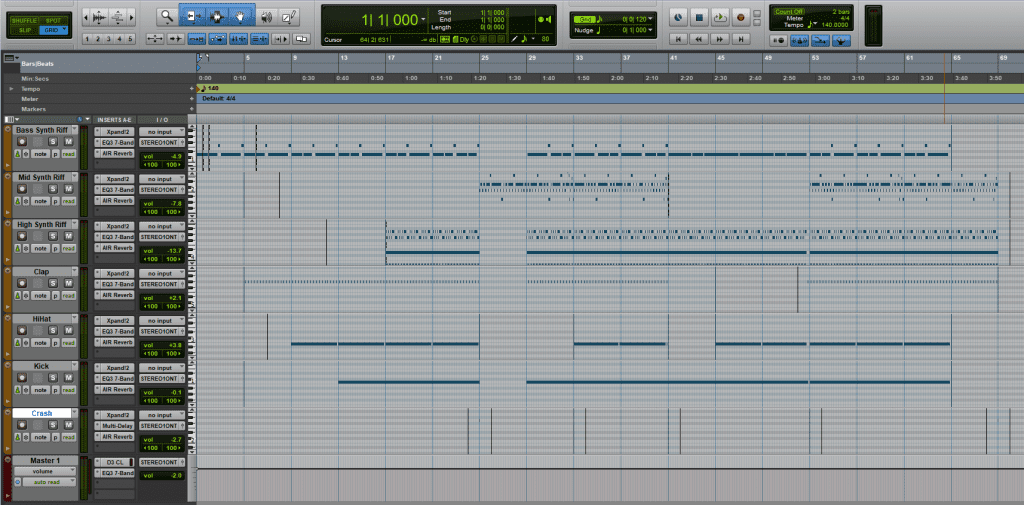
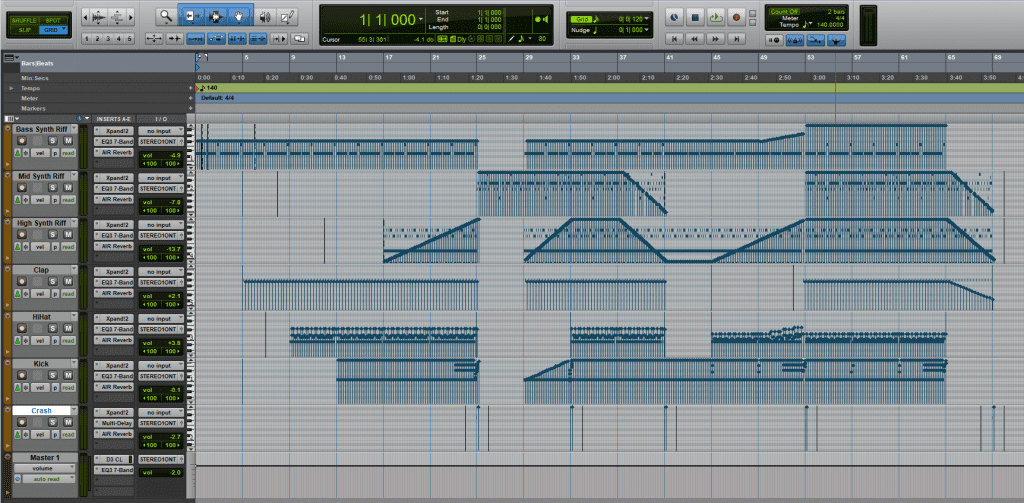
The original pieces were also a nice challenge to try and create, as I did not want to just make a remix EP based on popular EDM songs. I wanted to make sure I had some original works in there that followed a general Trance/Techno structure, including an intro, a build up or two, a drop or two, some main sections and an outro, which I believe I was successful in maintaining because I kept these sections in mind as I was designing the songs, structuring build ups with the use of steadily rising velocity in ProTools to cut most of the synths away for the drops, as well as smooth intros to slowly introduce the main sections of the songs, and outros to give each song a natural conclusion. Maintaining this structure throughout the songs with the help of research helped me to understand more about writing riffs and how to signify changes from one part to another, which helped to make my songs sound more professional after the mixing and mastering process.

In addition to the practical elements behind the aforementioned remixes, I also enjoyed creating them for my own personal reasons, thanks to the influences that inspired me throughout this project. With regards to the Levels remix I made, the artist of the original, Avicii, was a huge influence on my life from when I first discovered his songs, and was one of the reasons I wanted to do this sort of thing in the first place. I was inspired by him because I really liked his creative ability and the way his songs sounded, giving me another outlook on electronic songs which I had never considered when I was younger. Even after his passing he is still my favourite EDM artist, and I wish I had the chance to thank for his incredible work that inspired the EP I have created for this project.

And, in regards to the Wandering Eye remix, Weebl has also been a big inspiration to me as I had heard of some of Weebls songs when I was younger and listened to them on a regular basis. Listening back to some of those songs now, especially the ones produced as part of Weebl’s virtual band Savlonic, is very nostalgic for me and brings back a lot of childhood memories, dreams and aspirations, and it was those that helped propel me through this project to do the best I could and put as much effort into creating this EP as possible.

Mixing and Mastering – Levels Dance Remix

Levels Dance Remix – The volumes, panning and plugins

The mixing for this track sees the main riff synth and kick drum being the lowered slightly, due to the sounds on those tracks being generally louder than the others. Regardless of this, though, most of the tracks have been lowered slightly to place focus on the vocals and the Octave Changer Synth, which have had their volume increased to bring them forward in the mix for their respective parts. This is because the synth sound I selected on the Xpand!2 plugin was quieter compared to the others (the opposite problem to the kick and main riff) and needed a very slight boost in volume to prevent it from being lost in the mix. The vocals needed it too, because they were one of the most important aspects of this remix (they were featured in the original song too), and it helped to give the lyrics some clarity, being able to be heard regardless of the other sounds in the background. In addition, all of the tracks, which were stereo tracks, were panned to the far left and right simultaneously to help the mix sound wider (where it covers more empty space in the stereo mix), because this achieved the same effect as if the panning was right in the center, but had the additional feeling of almost encircling the listener on the speakers, playing sound all around, like a surround sound system.

There wasn’t much to be done when it came to the mastering stage, as I liked the sounds as they were. This was because it felt quite robotic to listen to (which was the intended effect), but this was offset by the vocals, which brought life into the track and rose above the synths, similar to how most female vocals “float above the synths” in Trance songs. This was also helped by the use of reverb on all of the synths, which helped to make the sound slightly more ‘wet’ (where the effect is heard on the output sound, compared to the ‘dry’ input sound where no effect is heard), because it allowed the synths to fill the same space with their sound, thus providing a nice back up sound underneath the vocals.

I would have also added some plugins onto the vocals, but I chose not to because I wanted to pay homage to Avicii, who unfortunately passed away earlier this year, by keeping the vocals exactly as they were in the original song (the original vocals came with reverb and delay already programmed into them so I didn’t need to add the plugins). The reason for this was because Avicii was an idol of mine when I was younger, and even now I still enjoy his works. I felt that keeping the vocals as close as possible to the original ones was a good way to pay tribute to an artist I enjoyed.

And lastly, I applied a compressor onto the master track to have a soft reduction to the dynamic frequency, as well as a reduction in the volume of the song. This was done as the song felt slightly too loud, which meant I had to use the compressor on the master fader to control how loud the song needed to be (in this case I reduced the sound slightly as I didn’t want it to sound too intense). I chose not to use the EQ plugin on any of the tracks for this particular song because I preferred the sounds I had chosen already, and felt that I didn’t need to change any frequencies in order to improve the sound quality. Furthermore, the compressor on the master fader did the purpose I would have used the EQ for across all of the tracks, reducing the dynamic frequency range to get rid of the highest and lowest frequencies to clean up the sound.

The song, prior to the mixing/mastering stage, sounded like this:

The song now sounds like this:

Mixing and Mastering – Dropz

Dropz – The volumes, panning and plugins

While the High Synth track was the melodic riff of the whole song, I felt that it didn’t need as much focus because of the fact that this was a dance track which focused less on the higher pitched melodies and riffs. I wanted the focus to be on the bass synths and the drum kit, which made me lower the volume of the synth riffs more than the others, while the drums remained between 0 and -3 decibels. However, the HiHat and Clap tracks both gained volume as, in the second main section of the song, I felt that they got buried underneath the mix and were hard to hear among the other instruments, so I gave them a volume boost to compensate for this without making them too loud in the rest of the song.

When it came to the mastering for the tracks, I understood that each track needed their own EQ to bring them to a more professional standard of sound, and played to each of the tracks strengths to enhance the overall quality. To do this, I examined each of the tracks and increased frequencies that I felt would improve clarity, while decreasing the frequencies that would make the sounds mesh together into a jumbled mess. For example: For the initial bass riff, I not only increased the bass frequencies under 100 Hz, as well as the frequencies above 2 kHz, but I reduced the upper bass/lower midrange frequencies around 200-400 Hz, to help open up the bass sound slightly and give it some clarity.

In addition, the clap and hi hat tracks received a boost at around 4.5-5 kHz, making the sounds clearer and crisper. This was important because of the heavy usage of the middle and lower frequencies in the song from all of the synths, which could have easily drowned out these two tracks if they had been mastered poorly. But, thanks to the boosting of the higher frequencies, these sounds stood out and were clear enough to not be buried under the barrage of sound from the synths.

Speaking of the synths, the Mid Synth Riff track, the one used for the drop, received a big boost to the frequencies at 200 Hz, which gave the sound a bit more of an “oomph” which helped the song to sound much heavier. Meanwhile, the High Synth Riff got a boost at around 3.5 kHz, allowing it to occupy more of the higher frequencies alongside the hi-hat and claps. The reason for this was because, with all of the other EQs on the other tracks, it muffled the synth and made it impossible to hear in the mix. Thankfully, boosting around these frequencies gave it more clarity and boosted the volume of the notes slightly, which helped it to remain in the mix without being overbearing.

The last instrument to receive the mastering was the kick drum. The original sound for the kick drum felt too hollow, so I applied a gentle boost to the frequencies between 20 and 100 Hz while reducing the other frequencies a little more. This way, I was able to give the kick drum a more ‘boom’ kind of sound (where the lowest bass frequencies are raised to give power to a synth/instrument), which was needed because none of the other drum parts received boosts in that area, and it allowed the kick to have more of an impact on the song, keeping the rhythm audible for the listener.

Each of the instrument tracks also gained a reverb plugin to simulate a small-room environment, which is barely audible on the track but still enough to be noticed on the drops. The reason for this was because I didn’t want to apply a reverb that was too much, and cause the song to be a mess of constant reverb and echo (I didn’t want it to sound like it was recorded in a church or a stadium!), instead opting more for a softer adjustment for a subtle change in the sound.

Finally, I applied a compressor and another EQ onto the master fader to control the dynamic frequency range and remove any unwanted frequencies from the mix. With the compressor, I chose to limit it at a 20.0:1 ratio with a threshold of -5 dBs, which means that any sound louder than -5 dBs would have the compression applied, and the input signal will have to cross the threshold by 20 dBs for the output level to increase by 1dB. Essentially this equated to a gentle limit that reduced the output volume slightly while reducing the frequency range, which was perfect because it reduced any sounds that were too loud and made sure the frequencies I didn’t need around the highest/lowest ends were cut out, or at least reduced, to clean up the track. I used the EQ to remove some of the frequencies below 100 Hz as well, as I wanted to make sure the sound was clear and not cluttered with inaudible frequencies.

The song, prior to the mixing/mastering stage, sounded like this:

The song now sounds like this:

Mixing and Mastering – Frantic Dance

Frantic Dance – The volumes, panning and plugins

The mixing stage was very simple for this song, as all I needed to do was increase the volume for the main bass riff and reduce the volumes of the other synths accordingly. The low and high synths were the same riff on different octaves, and I reduced the high synth more than the low one because the higher frequencies stuck out quite a lot in the mix, and I wanted the focus to be on the lower frequencies of the sounds, but with varying volumes throughout the bass synths to avoid making the track sound muddy and cluttered with sounds at the same frequency.

In regards to the mastering of the song, I found that there was very little to do to help improve the song beyond what it already sounded like, although I believe the choices of plugins did help to create a song I’m genuinely happy with. Each of the drums and synths received a reverb plugin (a plugin which simulates space), which was adjusted to make the song sound like it was played in a small-to-medium-sized room, with enough reverb to make the effect audible but not enough as to drown the song in constant reverb. This was done because it allowed each of the instruments to feel like they were producing their sounds in the same room, thus giving the sound some consistency across the multiple synths and make the timbre sound fuller (where it covers more of the frequency range).

However, as I quickly discovered, there were some frequencies I didn’t want in the song, as it made the song sound slightly too muddy for my liking. This was where the master track came in – I applied an EQ onto it, which I then used to reduce the low-end frequencies (from 100 Hz downwards) to remove some of the lowest sounds which weren’t completely audible to the human ear (they can hear from 20 Hz – 20,000 Hz), but were still enough to make the song sound too ‘boomy’ (where the lowest frequencies are raised higher to make the bass sound excessive). Cutting these areas added some clarity to the bass sounds (as described here) which was important because I didn’t want the song to be a cluttered mess of muddy sounds all conflicting with one another, as that would make the song sound much worse than intended.

The song, prior to the mixing/mastering stage, sounded like this:

The song now sounds like this:

Mixing and Mastering – Number 2

Number 2 – The volumes, panning and plugins

The mixing for Number 2 involved a simple rise to all the volumes of the synths across the board, with the kick drum and “Synth 2” (a lead synth with octave changing notes) receiving the highest boost while the other synths, while also boosted, did not receive as big of a volume boost. The reason this was done was to raise the loudness of the kick drum and synth in particular, but also to make the track as loud as possible without distorting the sound, to allow the drop in the middle of the song to have a bigger impact when it hit, as well as helping the rhythm of the song to be easily heard over the other instruments.

It also helped when it came to the mastering stage because I used a compressor on the master track to reduce the dynamic range slightly across all the tracks, which allowed the lower frequency sounds to increase in volume a little further. This was done to give the bass sounds, as well as the kick, a more ‘full’ timbre, so the sound felt much bigger than it was before and kept the emphasis upon them instead of the higher frequency synths, which were less important to keeping the rhythm.

The EQ I added on the kick drum gave it a much needed boost in the higher frequencies. At 4kHz, I added 6 dBs of gain to the EQ, which helped to give the kick drum some clarity underneath the rest of the track. This was helpful because, previously, the kick drum had been buried underneath all of the other sounds and was difficult to hear, so with a bit of boost on the higher frequencies putting emphasis on the initial part of each kick drum beat, it allowed it to be heard over all of the other synths in the song. The hi-hat got a similar treatment, it received 3 dBs of boost at 10 kHz for the same reason as the kick: to gain clarity in the mix.

The snare, however, was a different case. It had enough of the higher frequencies to stand out in the mastering stage, but it didn’t feel like it had enough impact to be taken seriously, which was why I applied an EQ onto it and boosted some of the lower frequencies, at around 200 Hz. The bass boost helped because it made each strike of the snare sound fatter (“Having more than a normal amount of signal strength at low frequencies or having more sound than normal by use of compression or delay”), which made the snare sounds fit into the already fat feel of the song nicely. In fact, a similar thing was used on the synth that accompanied the main bassline drop synth, making the sound fatter to help add more lower-end frequencies to the mix, supporting the bassline.

That bassline on the drop got the most attention during the mastering stage, as I wanted to have a really rough, hard-hitting riff which made people want to dance to it. To do this, I used a Fuzz-Wah plugin on ProTools to add a lot of fuzz to the synth around the 7 kHz range. This actually boosted the higher frequencies for the use on the fuzz, making the bassline sound clear despite the fact the notes were on the lower frequencies. In addition to this, I used an EQ to boost the frequencies slightly at around 1000 Hz, and the reason for this was to help add some emphasis around those frequencies, creating a thicker sound overall. This was perfect because the combination of these plugins helped to create a wonderful combination of a thick, hard-hitting bassline synth which was also really clear and rhythmic.

The song, prior to the mixing/mastering stage, sounded like this:

The song now sounds like this:

Mixing and Mastering – Wandering Eye Dance Remix

With the sounds selected from the Xpand!2 plugin and the initial sequencing elements done, it was time to mix and master all of the tracks.

Wandering Eye Dance Remix – The volumes, panning and plugins

In regards to the mixing for this song, I raised all of the levels across the board to raise the initial volumes of the tracks, before lowering it on the master fader on the right. This was done to make all of the instruments louder initially, balancing the tracks accordingly at that higher volume before lowering the volume of all of them on the master fader, and this was done to make the mixing a little easier to manage for the mastering stage, only needing to raise or lower the master fade if all the tracks needed a volume boost/reduction. In regards to the panning, I panned the bass synths to the left and right, as well as panning the audio on the stereo vocal tracks to the far left and right to give a bigger sense of space on the track, hoping to avoid cluttering the center with too much noise.

In the mastering process, I began with applying a compressor, an equalizer (EQ), and reverb to the vocal tracks, in order to adjust the dynamic range (the compressor) and the frequency levels (the EQ) of the vocals, as well as simulate an environment where the vocals are being sung (the reverb). Initially there had been only one vocal track, but I split it up during the editing process and placed some parts onto the second track (the one called Audio 1). This track was to be the radio effect that had been placed on the vocals during the first verse, which I recreated using the EQ for a part of the second verse I had split from the rest of the song (when the lead singer says “the way I do about you”) as well as at the end of the song when he is talking about ways to stop the female vocalists wandering eye. I did this by lowering all the frequencies in the EQ, except for the frequencies around 2.64 kilohertz (kHz) which I raised, giving the audio a radio-like sound. To improve it, I applied a compressor on some of the higher frequencies prior to applying the EQ, which helped to improve the volume of the track, before applying a small amount of reverb to it to make it fill more of the auditory space.

The compressor and reverb were also used on the main vocal track in the same way, but the way the EQ was used was a little different. Instead of a radio effect, like on the second vocal track, I boosted the frequencies at 5 kHz. This effect helped to make the vocals easier to understand because the increase of the higher frequencies added extra presence to the words that were sung, improving their clarity and helping to stop the vocals from getting lost under all the other instruments.

The hi-hat and snare drums both received boosts at around 4.5 and 5.5 kHz respectively, boosting their higher frequencies to help them sound crisp and clear. Similarly to the vocals, they needed this boost to help them stand out and not be buried underneath the synths because they had too much emphasis on the lower frequencies without the EQ.

I followed this by applying a compressor onto the kick drum, to reduce the dynamic range (“the ratio of the softest sound to the loudest sound”) and boost the volume of the lower frequencies, which I then boosted slightly further with help from the EQ, with some slight reductions from 300 hertz (Hz) to 3 kHz. The intended effect was to give the kick more of a deep ‘boom’ sound, because it helped the kick have more of an impact when coupled with the bass synths. This was also helped by the usage of reverb, because it allowed the sound to become ‘wet’ (where the output sound is affected by the reverb), and, similarly to the vocals, it allowed it to fill more of the empty space in the audio.

The reverb was the same for every single instrument and vocal on this song, as I wanted a consistent sound that wasn’t hindered by one instrument/vocal that didn’t have a reverb, compared to the others that did. On the subject of things being the same, the EQ on both of the bass synths was the same too, adding extra volume to the frequencies around 70 Hz to boost their existence in that range.

The synth-guitar track needed that extra level of presence in the track due to its melodic nature, so I used a compressor to reduce the dynamic range of the sound to boost the lower frequencies to a similar volume level as the higher frequencies, followed by boosting the frequencies at around 3.5 kHz on the EQ to add presence to the track, and then finally the reverb to keep the sound of the synth consistent with the rest of the track. I chose to do all of this because I wanted a loud, harsh guitar-like synth that could stand out on the choruses, but could also help support the vocals when it came to the verses, and I believe the way I mastered the track allowed the synth to perform that role perfectly.

And finally, the master track received a very light compression which slightly reduced the higher frequencies and louder noises from all of the tracks, further helping to get a consistent volume level throughout the song. This was used as a general compression for all of the tracks because I felt that the song had too many opportunities to be too loud or too quiet around the start and end, and I wanted to make sure the volume remained at a constant level despite the changing intensities from the use of velocity on the sounds. This was done because I did not want to have a part in the song that was suddenly louder than the others, which could potentially add unneeded distortion to the song form being too loud, which would be both horrible to listen to and equal to an unprofessional mixing/mastering quality.

The song, prior to the mixing/mastering stage, sounded like this:

The song now sounds like this:

Electronic Sequencing + Voices – Levels Dance Remix

The original song that inspired this remix was the song Levels by Avicii (released in 2011). Avicii, otherwise known as Tim Bergling, was an EDM artist that created a variety of well known songs within the House genre, such as Levels, Hey Brother (released in 2013)Waiting For Love (released in 2015) and Wake Me Up (released in 2013), the last of which reached 1.6 billion views on his YouTube channel. Levels was one of the first songs I encountered from this artist (I discovered it in 2012, a year after the song was officially released), and it quickly became one of my favorite songs thanks to its repetitive, upbeat nature. Listening back to his work again inspired me to create a dance remix for Levels, and made me want to tribute this piece to the artist who, for most of my teenage life, inspired me to try creating songs of my own.

Levels Dance Remix – The ProTools Session

I wanted to capture the essence of the original song in my own work by using elements from the original piece, such as the vocals, the riff synth, and the octave-changing synth that is heard in the original song. I didn’t want to recreate the exact sound of the original synths because I wanted to create my own version of the sound, so I chose some different sounds in the Xpand!2 plugin which could suit the remix I was creating, giving it some original-sounding synths to give my own twist on the well-known riff from the original.

In contrast, however, I did manage to find a YouTube video where someone had isolated the vocals from the rest of the song, and I used that vocal sample in the track. The reason I did this was to give some authenticity to the remix by including another element of the original song that wasn’t just the well known riff. This helped in the creation of the song because it allowed me to design a drop around the vocals when they came in for the first time, and they helped to add life to the track.

There were a multitude of different synths in this song, almost all of which played a different kind of riff to add variety to the song. The drum synths were as follows: the kick was a simple ‘4 on the floor’ beat, with claps on every second beat and hi-hats between the kicks, giving the song a typical drum beat found in Trance songs (since I wanted to make a Trance remix of the original House song). There were 2 synths (the main lead synth and the bassline synth) which played the main riff, alongside a rough-sounding bass accompaniment synth that played 2 sounds every 4 beats, a rhythmic synth that played in time with the drums but with the tune of the song, and an octave-changing synth that was similar to the one found in the original song. The drums were used to keep time in a genre-specific style, while the synths played the riffs, melody and bass parts to form the body of the song.

Levels Dance Remix – The use of Velocity in the sequenced elements

I automated the velocity in ProTools to create build ups and simulate fade-ins on the kick drums and each of the synths. As seen on the image above, the automated rising of the velocity happened at the start of the song, so it started off quiet and built up to a basic chorus, which was then followed by a drop for the vocals, and a slow build to a bigger chorus, followed by another quick fade-in of the octave-changer synth. And lastly, this all culminated in an automated reduction at the last section of the song, for a nice, smooth ending. All these build-ups and reductions of velocity helped to change the intensity of the song as it played, making the track sound less robotic thanks to the automation I used, because it added a nice variety of softer sounds among the harder, more forceful notes played on the main sections of the song, and it helped to make this track more than just a simple tribute to Avicii in that way.

Electronic Sequencing – Dropz

Dropz – The ProTools Session

Dropz is an interesting song because it is designed in a different way to the other songs in this EP. The initial bass is sequenced to play on the backbeats for the majority of the time, playing on the last two 16th notes of each beat (where 8th notes play twice as much as 4th notes in the same amount of time (which is what the kick drum is playing), 16th notes play twice as much as 8th notes, making one 4th note the equivalent of four 16th notes), so the sounds play after the first beat but just before the next one. Instead of using the bassline to help the drums keep rhythm, the bassline is more like a bass riff that repeats itself throughout the song (except on the drop), independent of what the drum kit does, because it provides a simple riff for the intro as well as a good lower frequency sound to fit around the drums throughout the remainder of the song.

The drums themselves are simple as well, with a typical Trance drum sound constructed with the help of this guide. For this, I used a ‘4 on the floor’ beat for the kick, a clap on every second beat, and hi-hats on every 8th note (so it plays twice as often as the kicks). Occasionally there is a crash cymbal after a build up/before a drop too. I decided to keep the drums simple for this piece as I didn’t want to create something too complex, which would make the song harder to dance to if it was played by a DJ, and instead I opted for a rhythmic, minimalistic kick drum that could keep the beat, sound punchy, and not get buried under all the other synths, with claps and hi-hats that controlled the higher frequencies to give the song a wide range of sound.

There are two more riffs included in this song: a mid synth riff for the drop, and a high synth for a more high pitched melodic riff, adding variety to the song without making it too complex or flooding the lower frequencies with noise. Both riffs repeat throughout the song, with the mid synth changing its pattern slightly towards the middle of the song and on the outro, removing some notes to make it even simpler. These were vital for this particular song because they both added extra layers of sound into the song, with one synth providing a harder-sounding sound for the drop while the other was used to help the build ups with its high pitched riff.

Dropz – The use of Velocity in the sequenced elements

Using velocity on this song helped to improve it a lot, as it added various tones and qualities to sound which gave it natural builds and drops. As seen on the image above, the High Synth Riff track used it a lot for build ups and on the outro. The effect of the velocity when it was lower made the synth riff sound softer, and as it increased, it allowed the sounds to get clearer, as if they were being played harder, similar to the notes on a piano. This meant that, especially in regards to all of the other tracks in the image above as well, each instrument could gain velocity at an automated rate which would help to build up tension, moving the song to a drop or a main section, or help the song get softer during an outro, and this is important because it allowed the flow of the song to change as it continued.

One other way that velocity was used was to show emphasis on particular sounds, especially on the Hi-Hat track. This was used to add some variety to the sound on the track, giving it a more human-like quality due to the sounds not being the exact same as one another, thanks to the varying velocities. The emphasis lay on the strikes on each beat, which was a logical choice as I wanted the hi-hats to work in tandem with the kick drum, in order to highlight where the beats were and help listeners keep time.

Electronic Sequencing – Frantic Dance

Frantic Dance – The ProTools Session

The sequencing for this 155 bpm song began with a bassline, which played notes on every 16th note. This created a bass riff with a sense of urgency right from the start of the song, and this was the intended effect because it was meant to signify the start of a long build to the first main section, where the hard bass synth kicks in. This effect from the sequencing of the bass, alongside the ‘4 on the floor’ kick drum beat, the snare on every second beat, and the syncopated hi-hats, helped to build up from the intro and release the tension at the drop, where the drums kicked in fully and the bass riff changed into something harder and more urgent than before.

The hard bass synth consisted of the same bassline repeated over and over again, before it changed up an octave on the second drop, still using the same notes but on a higher pitch than before. This was done to add some variety to the song, showing a change from one part (in this case a main section/build up) to the next (the drop and following build up to the next main section), allowing the song to continue flowing at a constant rhythm. It was done in this manner because the rhythm is arguably one of the most important parts of any song, and bass synths/instruments, alongside the drums, are considered rhythmic instruments which all help to play a core part in maintaining the tempo of a song, and are vital to use for build-ups and drops as that is where the rhythm of the song can change if it done correctly.

The High Synth and Low Synth tracks played the same riff at different octaves to one another, providing a melodic riff over the top of the drums and the basslines. It was important to have some higher pitched synths in the song because it would have made the lower frequencies too crowded otherwise, making the song sound muddy (where there is too much noise in the 400-800 Hz frequencies, causing the song to lack clarity/definition) and retracting from the overall quality of the sound. This ‘muddiness’ is not ideal for a dance song, as it needs to have enough clarity so people can understand it was well as having enough low-end frequencies to add to the rhythm to keep people dancing.

Frantic Dance – The use of Velocity in the sequenced elementsThe velocity automation in the image above helps to show what parts of the song built up and on what tracks it was used. For example, the High/Low Synth tracks used it at the end of the intro to signify a build up to a drop, where the Hard Bass Synth starts. As drops are an important part of an EDM song due to the high levels of energy it contains, since it is the release of tension built up in the ‘build ups’ just before, I wanted my drops to sound like they had a big impact when they hit, and to make sure that was the case I allowed the synths to build up to those drops using velocity, and cut those synths out so the Hard Bass Synth and the drums could take over the drop. This way, the rhythm changed and the sound was relatively minimalistic, which was recommended for a good drop, aiming for an effect where, simply, people would want to dance to it due to its rhythm and minimalism.

The main bass synth also benefited from the velocity applied upon it, but in a different way. I used velocity to put emphasis on different notes within the bass riff, adding variety to the sounds throughout the song, but most notably on the intro. This was to set the rhythm for the piece and help maintain it as the song went on, including the automated fade ins that were drawn into ProTools, because of the emphasis I wanted to put on the rhythm to help make the song easier to dance to, which is quite fundamental in an EDM song because, if you can not dance to it, then it is not serving its purpose as an EDM song. The kick drum also received some automation on the build ups for a similar reason: it is a rhythmic instrument and I felt that using velocity in such a manner would not only help to keep the tempo constant, but also put emphasis on the build ups alongside the other synths.

Electronic Sequencing – Number 2

Number 2 – The ProTools Session

Number 2, which was called as such because it is the second song I made for this EP, is a 140 bpm EDM track that was created using a lot of harsh-sounding synths, a hard-hitting kick drum, a couple of build-ups, and a drop (where the rhythm/pace drastically changes in a song to improve its energy, usually after the aforementioned build up). To do this effectively, the kick used a 4 on the floor pattern for the majority of the song, with some parts, including just before the drop, where it began playing every 8th note, and then every 16th note, before stopping for a bar, and then going back to the 4 on the floor pattern. This sequencing allowed the kick drum to help the song naturally build up to the drop in the middle of the song, thus providing an extra function instead of simply keeping rhythm.

The snare and hi-hat also accompany the kick drum on the drum kit, with both rhythms being simple to sequence in. The hi-hat strikes on every 16th note, with variations in velocity to put emphasis on certain notes, while the snare strikes on every second beat 3 times before doing 2 syncopated strikes, one strike on the 8th note after the 3rd beat and the other directly on the 4th beat. Both patterns repeat throughout the song with the exception of the intro and the drop, because they are there to help keep rhythm and support the kick drum as it does the same.

There were multiple synths used on this song, all of which used riffs throughout the song, regardless of whether they were bass synths or synths on higher octaves. The bass synths all had riffs that were on the beat of the kicks, used initially to set the tempo in the intro, but then as a way to provide a loud, hard-sounding bassline during the rest of the song, which especially became the focus of the song during the drop, while the synths that moved into the higher octaves played a melodic riff to accompany the basslines, not wanting to drown it out, because if it did, then the song wouldn’t be as easy to dance to, which takes away from the intention of making it an EDM song.

Number 2 – The use of Velocity in the sequenced elements

The velocities shown above dictate where the intro, drops, and outro were located. As shown, most of the automation occurred during the songs intro/outro, to give the song a build-up into the first main section of the song, and a nice smooth outro to end the song with. The intro is important to get right, as using a build in a dance song is quite commonplace to help build tension through the use of turning 8th notes into 16th notes, which I helped to emphasize with a steadily rising velocity on the bass/melodic synths that accompanied it, making it stand out before the first main section. The outro was more of a creative choice because it was a good way to wind down on the song after the hard sections previously, which give the song a softer intro and outro in order to get warmed up to dance for the song, and some time to relax after the main parts.


Page 1 of 2

Powered by WordPress & Theme by Anders Norén

Skip to toolbar